 IMS5000 Manual
IMS5000 Manual
IMS5000 Manual
After successful login, the Files Window will appear. It is compromised of six sections.
Most items within an active IMS window have an underlined key letter. This indicates the user can use ALT + "key letter" to perform a command or path to a command.
For example, "F" is underlined in the word "Filename" on the IMS5000 run window. In this window, you can press "ALT + F" to path into the Filename field.
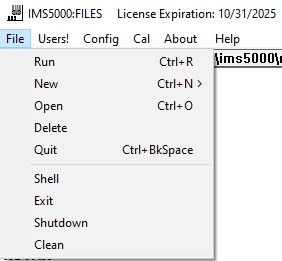
All file commands with Ctrl+ can be executed with their specified keyboard shortcut.
Run Ctrl+R
Allows the user to run and print marking files stored either on the hard drive or on a floppy disk inserted into the systems disk drive. [LINK]
New Ctrl+N
Displays the New pull down menu. (Requires a SECURITY LEVEL of 3 or 4 to access)
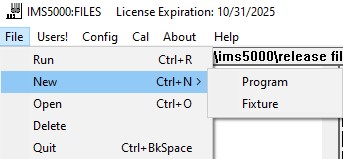
the New menu allows authorized users to create new Programs or new Fixtures.
Open Ctrl+O
Allows the user to view or edit an existing file. Click on the file to to open, then click on File → Open.
Delete
Used to delete obselete files. Click on the file to to delete, then click on File → Delete.
Quit
In the Files Window, Quit takes the user back to the login screen.
Exit
Exits the IMS5000 program.
Shutdown
Same details as in Getting Started
Clean
Same details as in Getting Started
Please view the page for Adding Users for details on:
Save Configuration
Saves the current state of the window, for example the size of the window.
Settings IMS5000
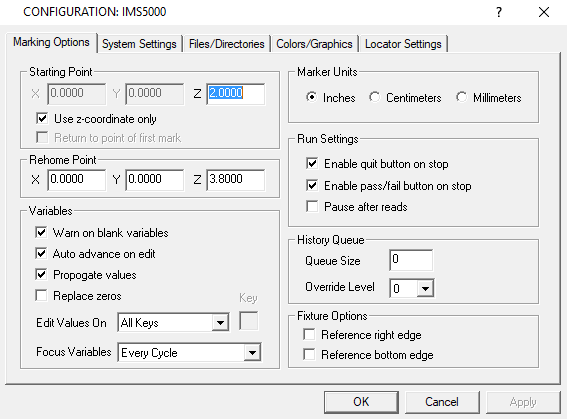
Marking Options
Starting point: Specifies the coordinates of the origin
Rehome Point: Specifies the coordinates that the printhead goes back to home to
Variables:
-Warn on blank variables: Gives a warning prompt when trying to run a program that contains blank variables
-Auto advance on edit:
-Propogate values:
-Replace zeros:
-Edit Values On:
-Focus Variables:
Marker Units: Specifies the system of measurement for a unit
Run Settings:
History Queue:
Fixture Options:
System Settings
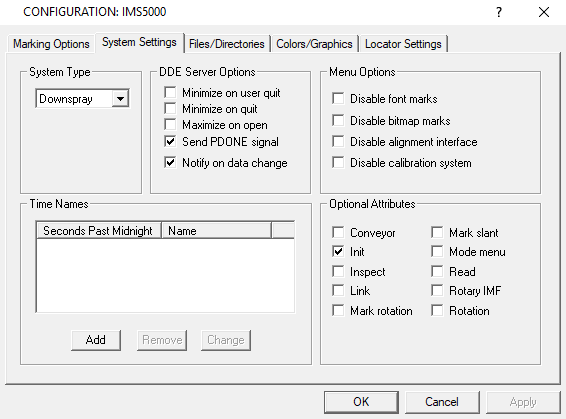
System Type:
DDE Server Options:
Menu Options:
Time Names:
Optional Attributes:
Files/Directories
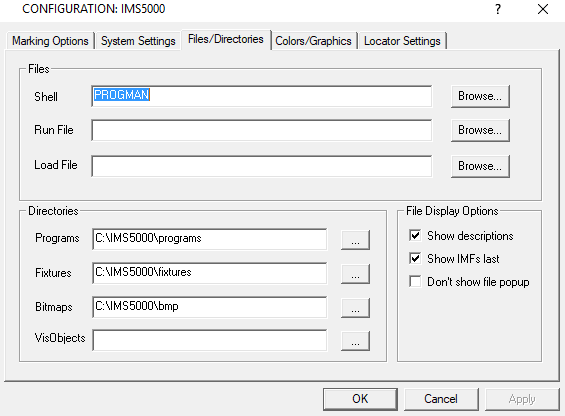
Run/Load File: Browse which file to run/load
Directories: Specifies from what directory to load the programs, fixture, and vision files
File Display Options: Specifies what is previewed from the file selection screenColors/Graphics
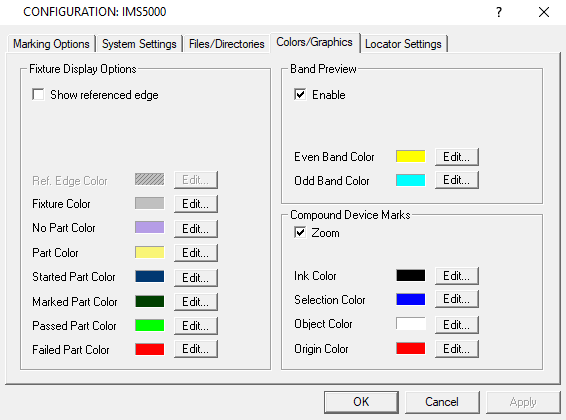
Allows for color customization within the program
Locator Settings
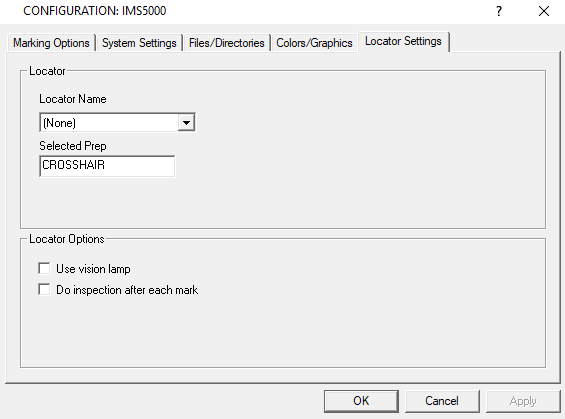
Locator:
Locator Options:
Devices
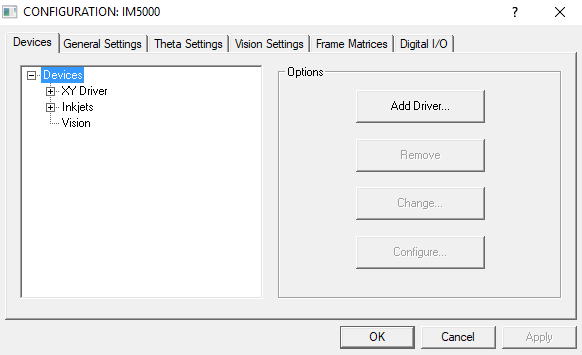
On the Devices tab, there are expandable menus to select an XY driver (system), Inkjet driver (printer), and a vision driver (scanner, locator, etc.). Ensure that the correct drivers are selected.
If the system is having issues communicating with the printer, also ensure that the correct triggers have been added. To check, select the XY driver -> configure -> triggers.
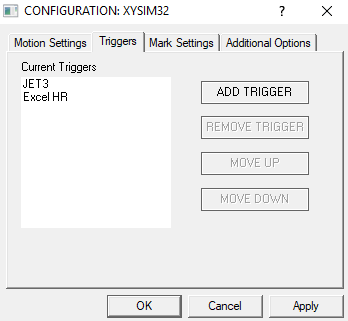
Necessary triggers are dependent on the type of equipment in use (printer, vision/scanner). For example, a JET3 printer uses "JET3" and an Excel High Res printer uses "Excel HR"
Theta Settings
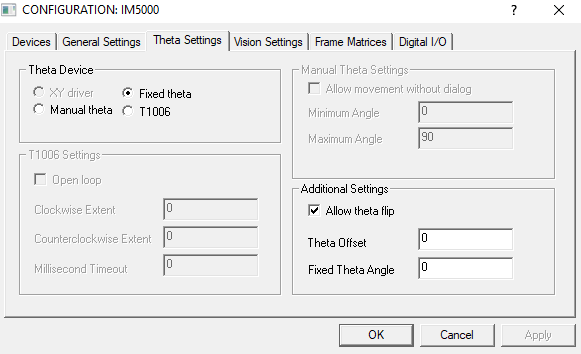
The Theta Settings tab allows for changes in the rotation of the printhead.
Fixed theta means no rotation of the printhead and the printhead is locked in place. Manual theta allows for the printhead to be rotated by hand. T1006 means the system will rotate the printhead automatically.
-Manual Theta Settings: determines the allowable range of motion that the printhead can manually be rotated (max 90 degrees).
-T1006 Settings: determines the allowable range of motion that the system rotates the printhead
In Additional Settings, Allow Theta Flip
Vision Settings
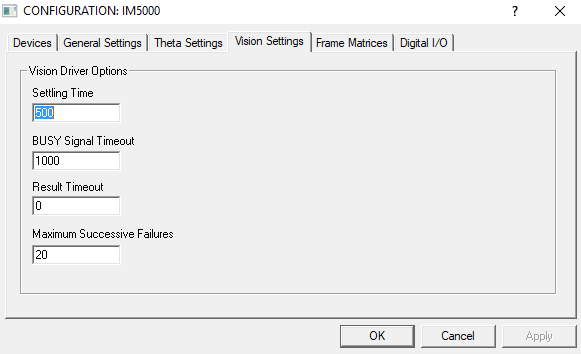
Settling Time:
BUSY Signal Timeout:
Result Timeout:
Maximum Successive Failures:
Digital I/O
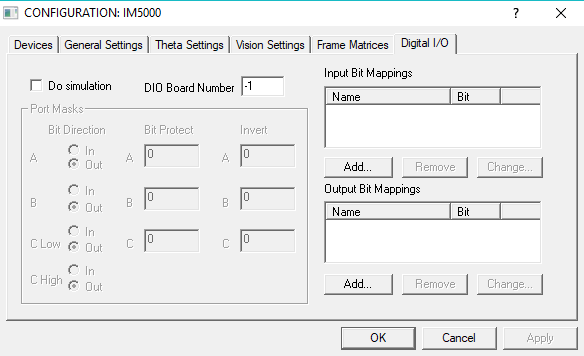 Do Simulation:
DIO Board Number:
Port Masks:
Input Bit Mappings:
Output Bit Mappings:
Same details as in Getting Started