 IMS5000 Manual
IMS5000 Manual
IMS5000 Manual
To run an existing file, verify you are in the IMS5000 files window. Then double click on the file or click on the file, File → Run.
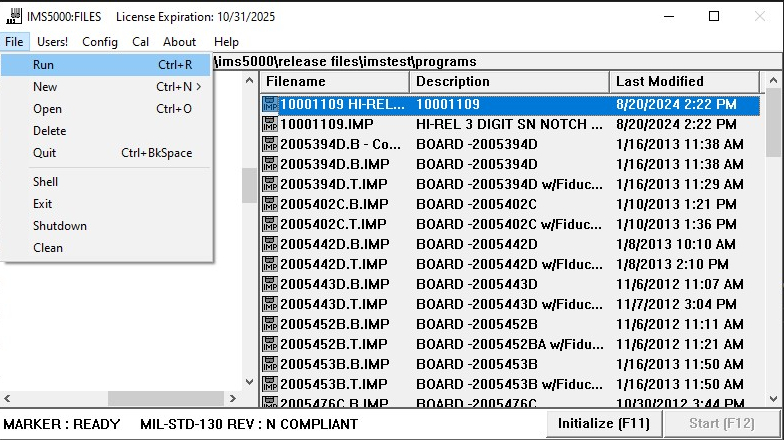
The run dialog box will appear.
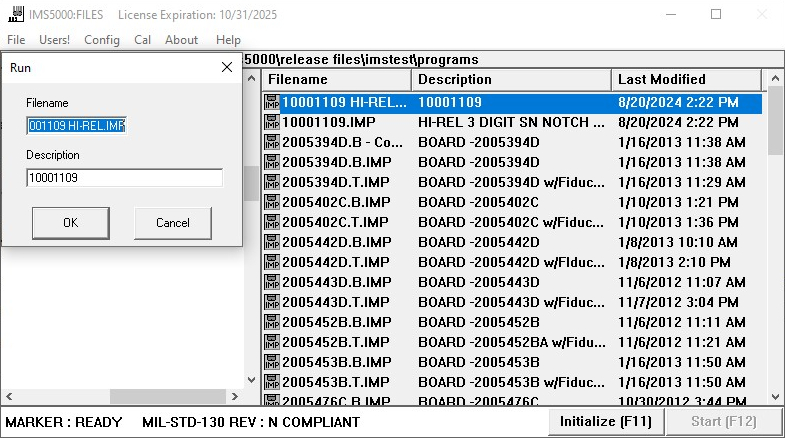
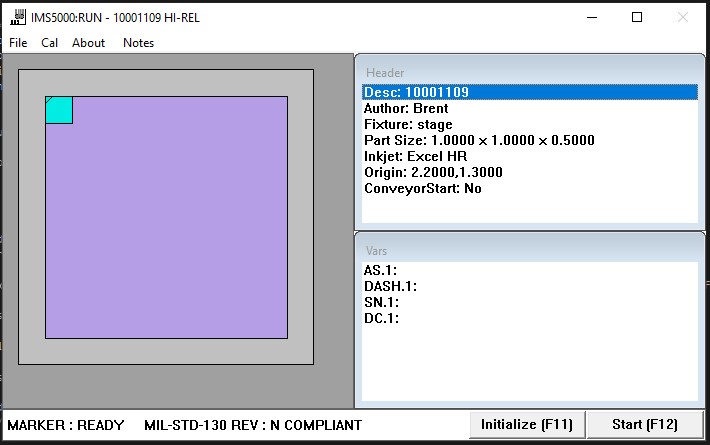
If you have the correct file, click on "OK" for the run window to appear. To exit the prompt, click on "Cancel".
To choose a different file from what is indicated, enter the name of the correct file or the appropriate file description.
NOTE: If using a file from an external drive or disk, input the name of the drive before the file name. For example an A-drive add "A:" before the file name.
If the file is not found in the directory specified, a "File Not Found" error dialog will appear. To correct, verify the file name and location and re-enter.
The File menu has familiar commands as shown in Files Window and Getting Started. Shutdown and Clean commands are found within the Inkjet menu.
Stop on Fails
Stops the program if the vision device cannot verify a mark (or if any vision failure occurs). The vision device could be a bar code scanner, character recognition, etc.
No Link
Suppresses link from occuring at the end of a marking cycle. Select this if you have already linked program files together in the Header section and you do not want them linked for a specific run.
NOTE: If you want the programs for all future runs update the header section.
No Link Auto Start
Link Auto Start means that as soon as one program ends, it will go directly into printing the next program linked.
No Conveyor Start
Select this if you do not want the conveyor to start automatially after printing for this run.
No Increment
Select this if you do not want serial numbers to be incremented for this particular run.
Provides the visual representation of the parts in a multple part fixture during run time and includes user input buttons for manual fixtures.
Manual Fixtures do not provide automatic feedback as to the quantity and location of parts loaded and unloaded within the fixture. The user must inform IMS software the intented quantity of parts to be loaded for marking.
Load parts as indicated within the fixutre information section of the window. If unsure, click on the +1 button each time a part is loaded onto the fixture. If the part quantity is known, click no Qty and input the part quantity.
General Rules for Manual Fixtures
Header
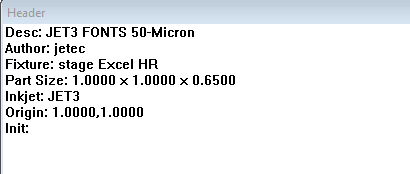
Provides the user with header information based on the marking file selected for printing.
Description
The description of the marking file is shown here.
Author
Displays the name of the user who created the file.
Fixture
Name of the intended fixture for use with the marking file.
Part Size
The width and length of parts in inches. (X, Y, Z)
NOTE: The Z dimension is for the print head clearance and to help determine an ideal print head distance from the part. The Z dimension is the difference in values between the highest point of the part (as it sits in the fixture) and the highest point in the fixture.
Inkjet
The name of the inkjet device to be used
Origin
The relative fixture home position in the format (x, y). By default, it is located on the upper left corner of the marking surface.
Rotation
The number of degrees that a part is rotated. If text were to be printed upright along the horizontal axis the rotation would be 0.000.
If text would be printed along the vertical axis and the bottom part of the characters were closest tot he left side of the part, that rotation would be 90.
If text would be printed upside down along the horizontal axis, the rotation would be 180.
If text would be printed along the vertical axis and the bottom part of the character were closest to the right side of the part, the rotation would be 270.
Link
Links one program to the next. If a program is specified here, after the current program is finished marking, this program will be loaded.
Inconlink
Increment on Link. Specify 'Yes' or 'No'. If yes, increments the Serial Number when link occurs.
The name of the inspector module supplied to perform an inspection (vision system). This feature is optional.
Inspectpos
Position the inspector in (x, y, z) format, relative to the origin of the part location.
Inspectprep
Inspector preparation